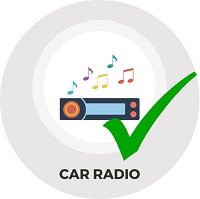
Upgrade Digital Radio DAB+ to a VW Volkswagen, Skoda or Seat radio | From 2011 on | Lots of new channels!
Do you only have a few stations that you really enjoy listening to? Welcome to the world of digital radio DAB+. If you have a VW Volkswagen, Skoda or Seat radio, you'll soon be able to listen to lots of new music or use one of the many news stations. We have a great solution for you.
With the DAB+ Interface 4514 you can receive many new stations and have a great sound. You enjoy digital, crystal-clear sound and a variety of radio stations. Also many national broadcasters.
The interface has the permanent service following function. So if the reception quality of the station deteriorates, the interface searches in the background for a service with a stronger reception from this station. FM support is not possible.
The included DAB+ window antenna can be used as an antenna. Any factory-installed DAB antenna can also be used. The antenna does not require a separate power supply as it is powered via the interface.
This interface is recognized and registered by the radio systems as a multimedia device (MDI), also known as Media-In. The current MDI devices (e.g. USB socket or AUX socket) are installed in the center armrest or in the glove compartment and are physically separated from the system there by removing the cable (removing the plug).
This is necessary because the system can only manage one MDI device. However, if you also install the CAN switch 430x/451x (version A), the interfaces installed in the car can continue to be used.
If you choose the CAN switch 430x/451x (version B), you can also use the Bluetooth interface 4303 in addition to this interface.
By the way: Many customers install this interface almost invisibly, mostly in the trunk or in the area of the glove compartment. All connections are easy to reach there.
 Functions:
-
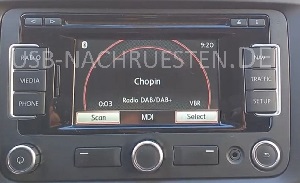
Lots of new channels – Digital Radio supports the DAB/DAB+ Standard.
-
Additional information – The DAB+ radio station provides further information about the program or current short news. The Dynamic Label function provides this information.
-
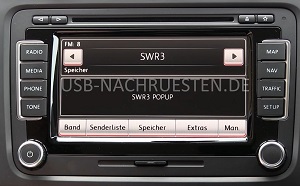
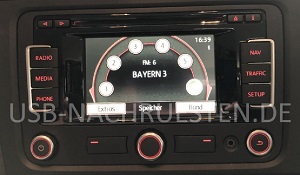
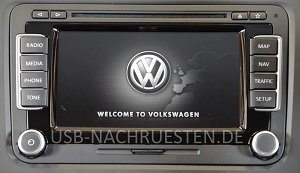
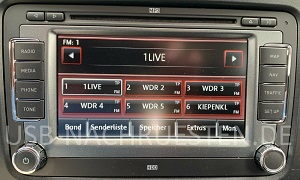
Fully compatible – Operation is fully integrated via the radio system. Radio stations are shown on the display. No additional monitors or remote controls required.
-
Important traffic information – To give you a free ride, this interface can provide you with the current traffic information and interrupts the broadcast for this.
-
Twice the best reception – Service-Following means that in the background the interface is constantly looking for a stronger reception option for the selected station. If the interface finds a stronger station, it imperceptibly switches to this station. This interface uses two separate tuners for this.
-
CAN bus Connection – The connection via the CAN bus ensured maximum Quality.
-
Update suitable – In the event of a change or further development, the interface can be updated via the mini-USB Connection.
-
Extremly important protection – The stable and impact-resistant steel housing protects the sensitive electronics over the long term.
 Installation:
-
Plug n' Play installation – Easy and fast connection. All connections as plug connection.
-
Easy Coding – No coding is required for this interface if the AMI function is already activated. Should it be necessary, it can be coded with a few entries. As? It is described in the installation instructions.
-
Useful Installation guide – Practical installation aids are available to you. Go to Installation examples You will also receive one Step-by-step installation guide.
-
Our service promise – We are at your disposal with a live chat or via faq@usb-nachruesten.de until successful installation. If you are not satisfied, you can return the product within 30 days and your purchase price will be refunded.
 Download:
 Operation
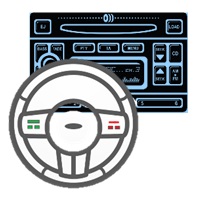
- Via the buttons of the radio
- Via the buttons on the multifunction steering wheel
 Technical specification
- Size of the box: 78 x 95 x 27 mm (LxWxH)
- Material housing: Metal
- Weight: 95g
- Supply voltage: 12 Volt
- Power consumption with the antenna (scope of delivery): 154 mA
- Power consumption without antenna: 110 mA
- Power consumption when not in use: 0 mA
- communication and control: CAN bus
 Scope of delivery
- Digital Radio DAB+ Interface 4514
- DAB+-window antenna with approx. 6,000mm cable and FAKRA connector
- ISO Quadlock wiring harness
- Digital step-by-step installation and user Manual (English/German)
 Compatible vehicles
| VW Volkswagen |
| VW Amarok - 2H | 2010-2016 |
| VW Beetle - 16 | 2011-2016 |
|
| VW Caddy - 2K | 2010-2015 |
| VW EOS - 1F | ab 2009 |
| VW Golf 6 - 1K | 2009-2012 |
| VW Jetta - 162 | ab 2009 |
| VW Multivan - 8P | 2014-2015 |
| VW Passat - B7 | 2009-2014 |
| VW Scirocco - 13 | 2008-2015 |
| VW Sharan - 7N | 2011-2016 |
| VW Tiguan - 5N | 2007-2015 |
| VW Transporter - 7H | 2010-2015 |
| VW Touran - 1T | 2007-2015 |
| Skoda |
| Skoda Fabia - 5J | 2009-2014 |
| Skoda Octavia - 1Z | 2009-2012 |
| Skoda Superb - 3T | 2008-2015 |
| Skoda Rapid - NH | ab 2013 |
| Skoda Roomster - 5J | 2007-2015 |
| Skoda Yeti - 5L | 2009-2015 |
| Seat |
| Seat Alhambra - 7N | 2011-2015 |
| Seat Leon - 1P | 2010-2012 |
| Seat Toledo - NH | 2013-2015 |
| |
| |
 Compatible radios
If you click on the radio image, detailed information will be displayed in a new window.
VW Volkswagen
| VW RCD 510 |
 |
| VW RNS 310 |
 |
| VW RNS 315 |
 |
| VW RNS 510 |
 |
Skoda
Skoda Amundsen II
Amundsen Plus |
 |
| Skoda Bolero II |
 |
| Skoda Columbus II |
 |
Seat
| Seat RNS 310 |
 |
| Seat RNS 315 |
 |
| Seat RNS 510 |
 |
Product safety information
Manufacturer information:
Juna
, ,
Responsible person:
onTrade GmbH
Ahornweg 8
Niedersachsen
Langlingen, Deutschland, 29364
ralf.waldau@ontrade.biz
Allgemein:
Muss das Interface freigeschaltet / codiert werden?
Nur bei Audi-Radios, bei denen kein AMI installiert ist. Für alle anderen Modell ist keine Codierung erforderlich.
Wie kann ich die Codierung vornehmen?
Sie kann mittels der Software VCDS vorgenommen werden. Wir empfehlen allerdings, die Codierung von einer Werkstatt vornehmen zu lassen. Die Codierung dauert nur wenige Minuten.
Kann ich auch mein iPhone per Bluetooth verbinden?
Ja. Es können alle Smartphones verbunden werden, die das standardisierte Bluetooth-Protokoll (Bluetooth 4.0) verwenden.
Kann ich die Tasten des Radios oder des Multifunktionslenkrades zur Steuerung des Interface nutzen?
Ja, uns zwar für die Regelung der Lautstärke und für die Steuerung und Auswahl der Titel. Siehe auch die Registerkarte Einbau + Bedienung.
Installation:
Wo bzw. wie wird das Interface genau angeschlossen?
Das Interface wird am Quadlock-Steckplatz angeschlossen, der sich auf der Rückseite des Radios befindet.
Benötige ich zusätzliches oder besonderes Werkzeug zum Einbau?
Sie benötigen übliches Werkzeug bzw. Elektro-Werkzeug. Gelegentlich werden unsere Entriegelungswerkzeuge benötigt.
Gibt es Anleitungen für den Einbau?
Im Menüpunkt Einbau-Beispiele finden Sie Beispiele für verschiedene Marken und Fahrzeuge für den Einbau unserer Produkte. Da der Einbau oftmals sehr ähnlich ist, kann man die verschiedenen Schritte der Anleitungen auch auf viele andere Fahrzeuge übertragen. Außerdem bieten wir Ihnen eine Schritt-für-Schritt-Einbauanleitung.
Was kann ich tun, wenn die Installation einfach nicht klappen will?
Die sehr ausführliche und bebilderte Anleitung ist eine große Hilfe. Sollten Sie damit nicht weiterkommen, schreiben Sie uns gerne eine E-Mail. In den allermeisten Fällen können wir Probleme und Fragen bereits kurzfristig per E-Mail klären.
Kauf:
Kann ich das Gerät zurückgeben, falls es mir nicht gefällt?
Ja, dafür bieten wir Ihnen unser 30-tägiges Widerrufsrecht an.