For all Streaming Boxes in Audi A3 8P (2006) with radio BNS 5.0 - retrofit a USB interface and SD card here
These instructions describe an example of how you can install a USB stick and SD card adapter in an Audi A3 8P (2006).
You can retrofit all Streaming Boxes in a comparable way.
In this example, a BNS 5.0 radio is used. These instructions can also serve as a template for retrofitting other radio models, e.g. Concert 3, Chorus 3, Navi Plus RNS-E, Symphony 3, Symphony 4, etc.
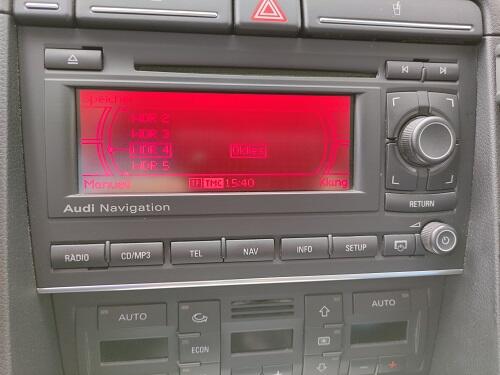
 Audi A3 - BNS 5.0 - remove radio
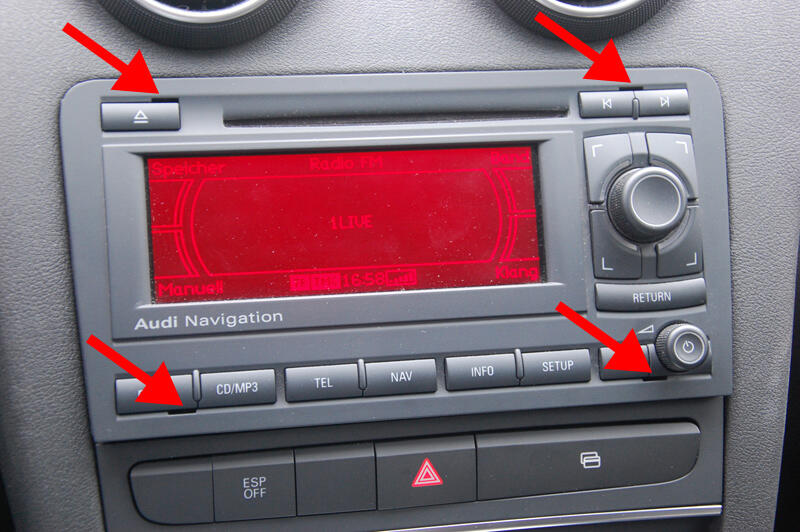
First the radio is removed. To do this, simply slide the removal tool provided into the 4 marked slots. When these are snapped in, you can pull the complete radio unit out on the hook.
 Audi A3 - BNS 5.0 - remove glove compartment lighting
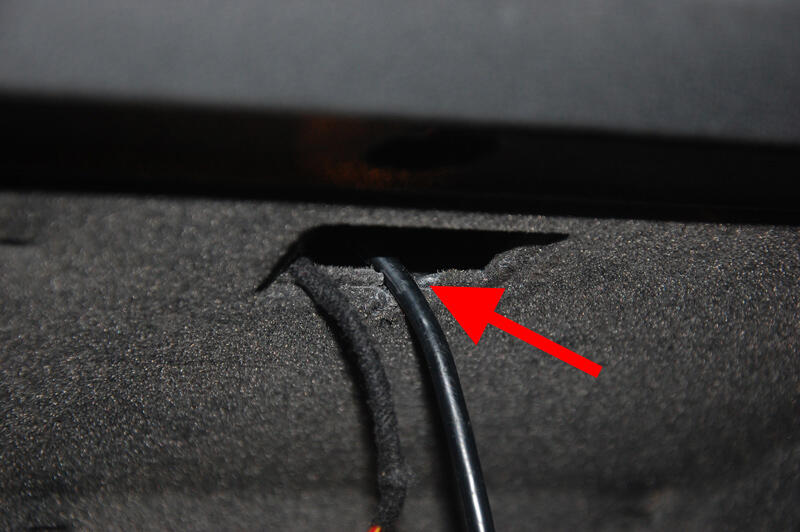
The glove compartment lighting is now removed. This is only lightly clipped on and levered out on the right-hand side. The connection cable for the adapter is laid through the opening in the lighting in the direction of the radio. In the radio slot you can check whether the connection cable is arriving there correctly. If you have difficulties, you can use a wire to stabilize the cable.
 Audi A3 - BNS 5.0 - Lead the cable from the glove compartment into the radio slot and connect it
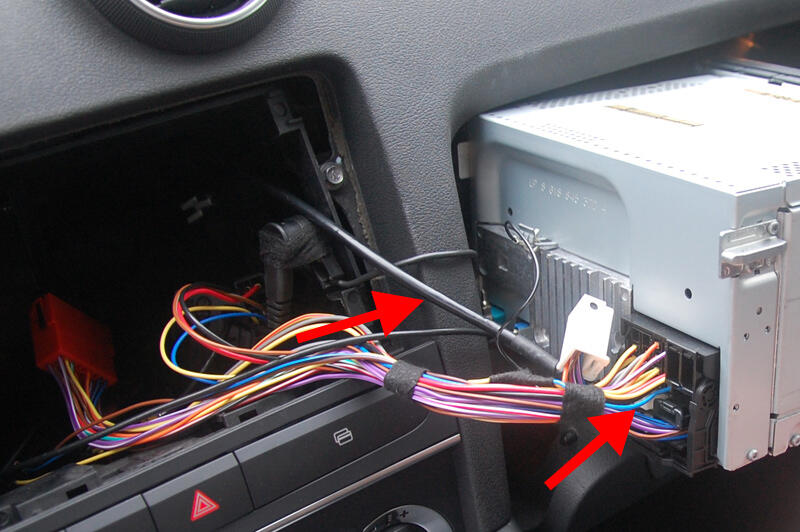
If the cable can be seen successfully in the radio slot, you can already plug it into the slot provided on the rear of the radio (see marking). The connection of the earth cable with ring eyelet is very important. Screw this to the radio housing, for example.
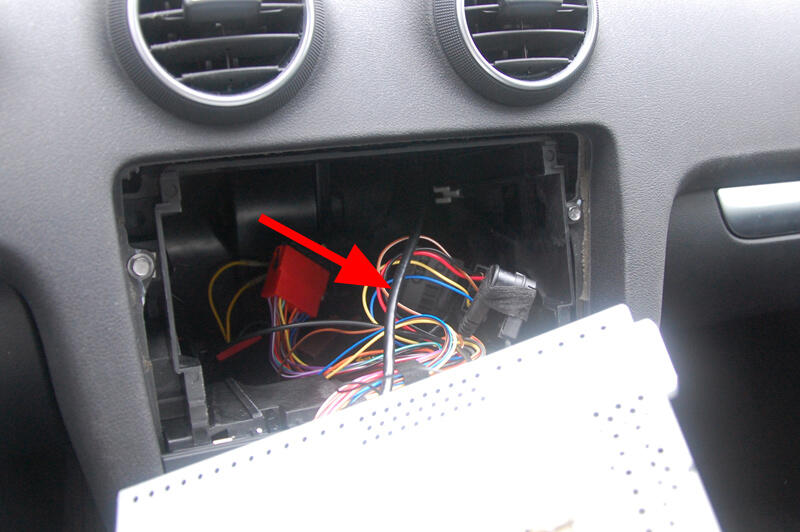
You can now slide the radio back into the slot (not yet fully snapped in).
Here you can see how the connection cable of the USB adapter was laid from the radio towards the glove compartment.
 Audi A3 - BNS 5.0 - Adjust the glove compartment lighting and clip it in again
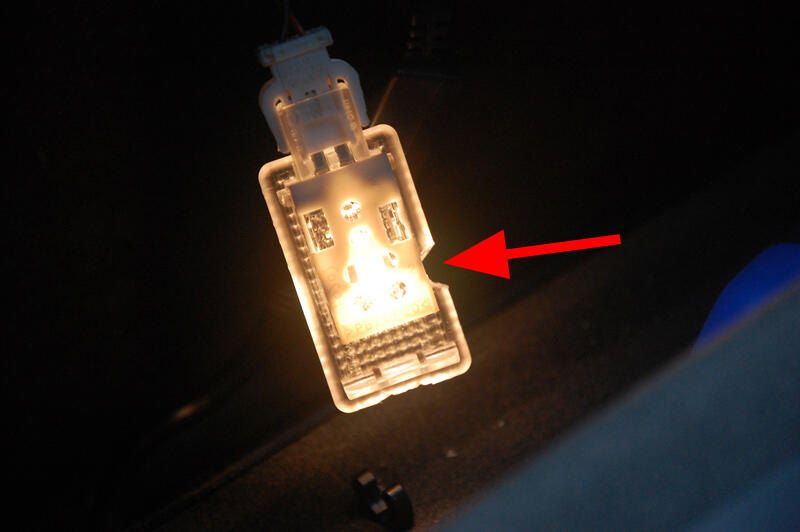
To ensure that the cable fits through the opening of the glove compartment lighting and is not damaged, a small recess is ground into the housing of the lighting. This means that all of the lighting is retained.
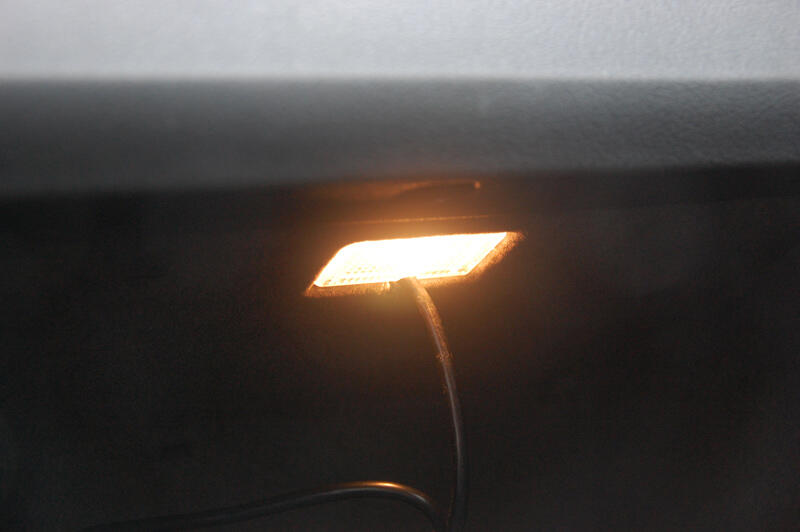
The glove compartment lighting can now be snapped back into place. You can clearly see how the connection cable of the USB adapter comes out there.
 Audi A3 - BNS 5.0 - Enjoy the USB interface in the Audi A3
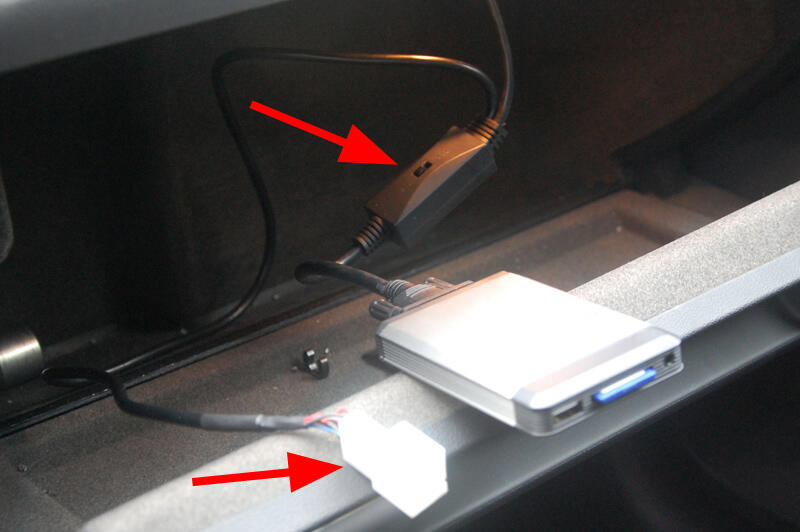
The USB adapter can then be connected. If you have installed an existing CD changer, you can connect it using the empty plug (see marking) and control it using the switch on the cable.
If the switch on the adapter cable is set to "MP3", the radio should automatically recognize the adapter as a CD changer. So you don't need any additional coding or the like. Information on equipping the USB stick or SD card with MP3 files can be found in the documentation and instructions.
If the complete function of the adapter could be ensured, you can let the radio click into place again.
ATTENTION: Before installing the radio, please test all functions of the interface / streaming box. If everything works, you can go to complete the assembly.
These installation example instructions are only intended as a model for the installation mentioned. In principle, no liability is accepted.
Errors or problems of any kind cannot be ruled out. We are happy to be at your disposal during the installation. faq@usb-nachruesten.de
