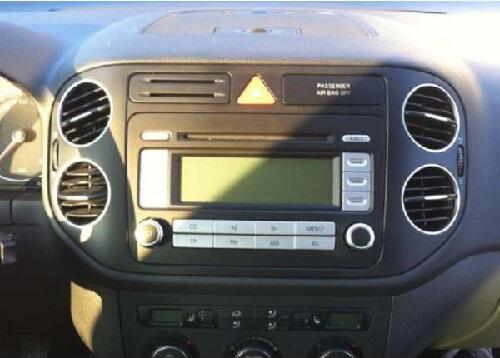
For all Streaming Boxes in VW Golf Plus with radio RCD 300 - retrofit USB-Stick, Bluetooth, SD-Card interface
This installation example describes how you can retrofit Streaming Boxes in a Golf Plus. With an RCD 300 radio. The Bluetooth streaming and USB interface functions can be retrofitted. You can also use these instructions to install other Streaming Boxes, such as the Streaming Box 1201, Streaming Box 1701 or the Streaming Box 1102.
These instructions can also serve as a template for retrofitting other radio models, e.g. RCD 210, RNS 300, RNS 310, RCD 500, etc.

 VW Golf Plus - RCD 300 radio - remove panel around the radio

First, the panel around the radio has to be removed so that the fastening screws of the radio can be accessed.
To do this, carefully lever out the two panels to the right and left of the hazard warning light switch.

Unplug the connector on the right-hand unit and unscrew the two visible screws.
 VW Golf Plus - RCD 300 radio - take off the panel

You can now remove the panel. This is only clipped and can easily be lifted off.

Carefully pry it off from all sides. Wrap a cloth or similar around the tool so that the dashboard is not damaged.
 VW Golf Plus - RCD 300 radio - remove the hazard switch

The panel can now be removed after the hazard warning light switch has been unlocked.
 VW Golf Plus - RCD 300 radio - remove the radio


The radio is now only attached with 4 screws. Loosen these so that the radio can be pulled out.
 VW Golf Plus - RCD 300 radio - connect interface

Connect the connection cable of the interface to the large Quadlock slot from the rear. It only fits into the lower left chamber, which is marked with "CDC" on the sticker of the radio.
 VW Golf Plus - RCD 300 radio - connect ground cable

The connection of the ground cable to the interface cable is very important. To do this, you can attach the ring eyelet to a screw on the radio housing.
 VW Golf Plus - RCD 300 radio - cable entry

The valve for the glove compartment cooling is used for the cable feed-through for the interface. This means that no holes or the like have to be drilled. Carefully pry off this valve.

Now you can push the cable through the opening from behind (access from the radio slot). It is therefore not necessary to remove the glove compartment.
 VW Golf Plus - RCD 300 radio - assembly completion

ATTENTION: Before installing the radio, please test all functions of the interface / streaming box. If everything works, you can go to complete the assembly.
These installation example instructions are only intended as a model for the installation mentioned. In principle, no liability is accepted.
Errors or problems of any kind cannot be ruled out. We are happy to be at your disposal during the installation. faq@usb-nachruesten.de
