VW Polo 9n / 9n3 with RCD 200 radio - retrofit USB interface - installation instructions
This explains in a simple way how you can install your USB-SD adapter in your car. The whole thing happens without much effort. You can also use these instructions to install other Streaming Boxes.
The installation is explained using the example of the VW Polo (Year 2006) and the radio RCD 200, but it can be applied to many other cars.
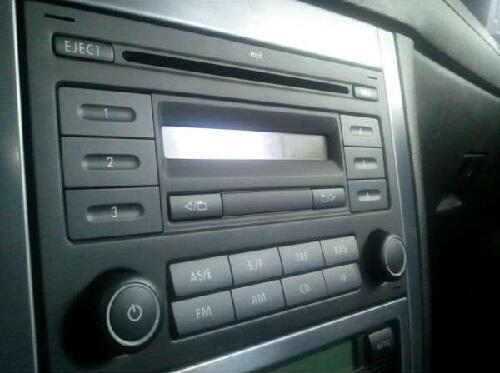
 VW Polo 9n/9n3 - RCD 200 radio - remove the radio
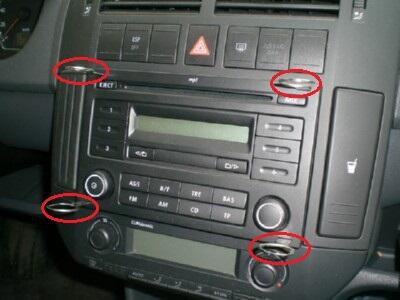
Insert the removal tools into the slots on the radio until they click into place. Then you can pull out the radio.
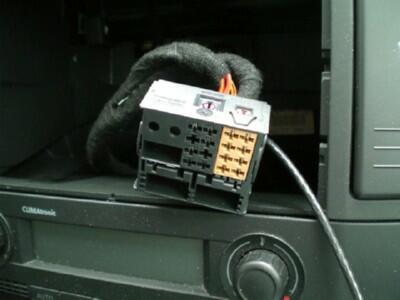
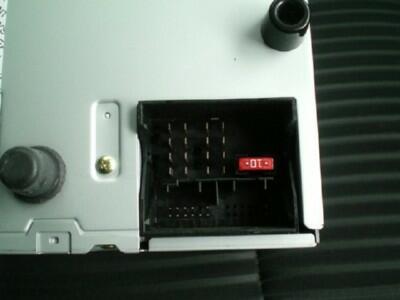
For information only: The first picture shows the Quadlock connector, to which the 12-pin cable of the adapter will later be connected. On the second picture you can see what this slot looks like on the back of the radio.
 VW Polo 9n/9n3 - RCD 200 radio - cable entry (1)
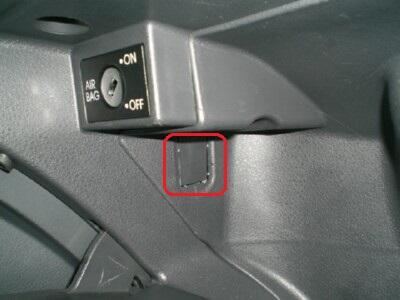
The easiest way is to put the cables for the adapter through an opening in the glove compartment. There is already a pre-cut cover behind the airbag switch (left). This can be levered out with very light pressure.
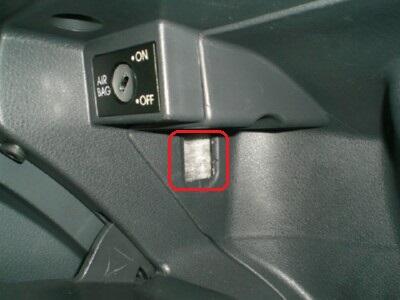
 VW Polo 9n/9n3 - RCD 200 radio - cable entry (2)
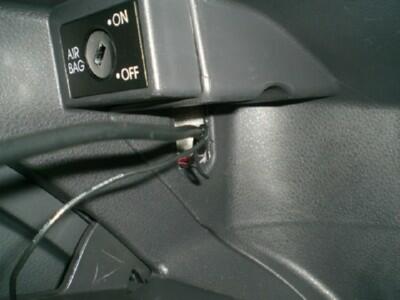
Durch die Öffnung können Sie jetzt das Kabel des Adapters durchschieben. Es ist darauf zu achten, dass man es vom Handschuhfach in Richtung Mittelkonsole schiebt.
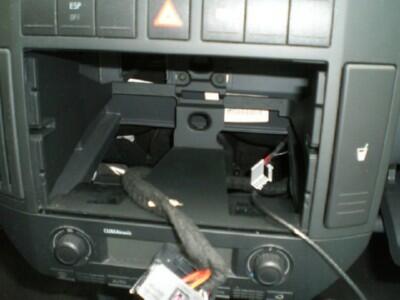
The cable then appears below the empty radio slot. You may have to move the cable back and forth a little so that it “finds the right way”.
The cable can now be pulled forward so that it can be connected to the radio.
 VW Polo 9n/9n3 - RCD 200 radio - Connection to the Quadlock slot
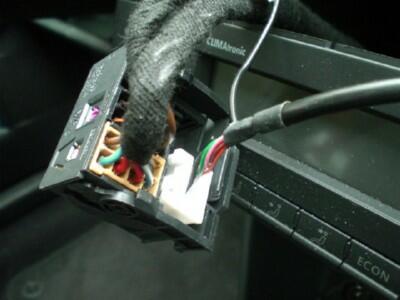
Connect the cable from the back into the Quadlock slot. The plug only fits into one chamber, so it cannot be connected incorrectly.
 VW Polo 9n/9n3 - RCD 200 Radio - connect ground cable
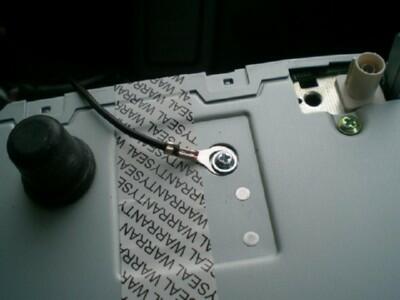
There is still a loose cable on the cable of the adapter with a ring eyelet at the end. This is for grounding. This can be attached to the silver screw on the back of the radio.
 VW Polo 9n/9n3 - RCD 200 radio - assembly completion
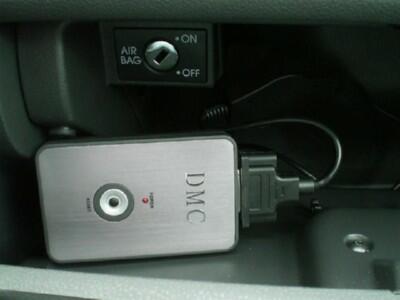
Now the Quad-Lock plug can be pushed back into the radio and the radio back into its slot.
You can now connect the adapter cable to the adapter.
Make sure that the DIP switches on the back of the device (if present) are set correctly (see instructions and sticker on the back).
Your radio has already been upgraded to include a USB and SD slot. You can now start using the radio and adapter.
ATTENTION: Before installing the radio, please test all functions of the interface / streaming box. If everything works, you can go to complete the assembly.
These installation example instructions are only intended as a model for the installation mentioned. In principle, no liability is accepted.
Errors or problems of any kind cannot be ruled out. We are happy to be at your disposal during the installation. faq@usb-nachruesten.de
